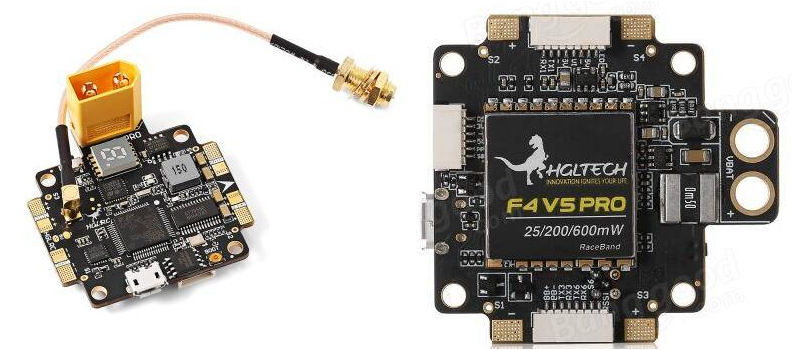
HGLRC F4 V5PRO Flight Controller 5.8G 40CH 0/25/200/600mW Switchable FPV Transmitte w/ 5V BEC OSD PDB

HGLRC F4 V5PRO is a high-performance all in 1 flight controller which is designed for racing drone players. Not only there is pdb combining with the flight controller perfectly, but also there is OSD, current sensor, voltage sensor, built-in high power BEC, Switcher VTX 0/25/200/600MW power and so on. HGLRC F4 V5PRO can give all that you want as a flight controller, it is perfect for FPV competition, aerobatic flight and aerial photography!
Would be great if VTX could be configured via OSD :(
Specifications:
- OMNIBUSF4 firmware
- Master STM32F405 GRT6, refresh rate up to 8K
- PCB 3OZ copper enhance current stability and cooling fast
- 5V 3A BEC output; 3.3 V Voltage output
- Exposed pad for easy soldering
- Compatible with all ESCs
- Integrated OSD, no need to flash firmware additionally,debug OSD via
BF ground station.
- Integrated current meter to monitor the real-time power consumption
- Adjust the PID by OSD via remote control
- Switcher VTX 0/25/200/600MW power digital display
- 2-6s lipo support
- Net weight: 13g (exclude wire)
- Size: L45 * W43mm, hole distance: 30.5*30.5mm
Warning:
Please read the cautions as follows, otherwise stability of your flight controller cannot be ensured, your flight controller will even get damaged.
Keep focus on the polarity. Check carefully before power supply.
Cut off the power when you connect, plug and pull anything.
Don't connect 5V or electrical power interfaces, otherwise your flight controller will catch fire.
The refresh rate of PID and Gyroscope is up to 8K.
Flight control characteristics:

Technical Parameters:
- Size: L45 * W43mm, hole distance: 30.5*30.5mm
- Master:STM32F405 GRT6
- Voltage:2-6S Lipo support
- MAX Current:200A
- 5v bec:3A
- Net weight: 13g (exclude wire)
Wiring Diagram:
Push-button Usage:
1. Channel selection: short press(1-8) or (A-E);
2.band selection: press and hold for 500ms-2 seconds
3.Output power selection: press and hold for more than 2 seconds.
0mW: Numeric Display ‘0’;
25mW: two LEDs on;
200mW: one LED on;
600mW: LED off
1) Long Press BOOT buttons,connect USB,The system automatically install the driver


2) open betaflight configurator,enter DFU mode
3) betaflight configurator,select “Firmware Flasher”,


4) Don't open the Settings
5) click “Load Firmware[Local]” Select the firmware “betaflight_3.1.6_OMNIBUSF4.hex”(The firmware version according to the actual situation)

6) click “Flash Firmware”,progress bar “Programming:SUCCESSFUL”
Finish!
Settings


Betaflight Automatically assigned port,click “Connect” Enter setup interface(Different computer COM)
F4 Flight control parameter Settings
FC horizontal ,The acceleration of calibration

2.4G sbus receiver:open UART1 RX option, then click “save and reboot”(Each set needs to be saved)


Note: click save after will jump to the startup screen, reconnect!
Choice of receiver SBUS mode

Open the voltage current detection

Open the black box, osd, article LED lights set (choose) as required

After set up parameters on this page, save the Settings.
Set up the function of remote control switch across the channel (below are for reference only)

The OSD Settings, according to the need to choose, drag the OSD schematic diagram of the parameters can be adjusted.

LED Strip configuration, set according to need

So far, flight control basic setup to finish.
F4 FC test
1) can connect the computer to download firmware & adjustable parameters
2) good connection test, after testing all functions buzzer sound
3) OSD display is normal
4) Have a camera
5) The remote control can be unlocked
6) Motor rotation
7)LED light
Get your from BangGood.


